In order to use Cisco Security Connector (CSC) for iOS, the endpoint must first be in supervised mode and managed by an MDM.
The easiest way to manage Apple iOS devices is to use Apple’s Device Enrollment Program (DEP); which is now rolled into their new Apple Business Manager (ABM) program.
However, there are certainly times when you may want to test CSC for iOS before setting up DEP or on a device you may not want to enroll in DEP.
There is a more manual approach to put an iOS device into supervised mode, leveraging Apple’s Configurator 2 app for macOS. To leverage this approach, you simply need an Apple computer running macOS, and install the Apple Configurator 2 app from the App Store. Connect the iOS device to the macOS computer via the USB to Lightning cable.

With the Apple Configurator 2 app, you can configure a device one at a time, or you can create what’s known as a “Blueprint”. The configuration of the blueprint is identical to that of a physical device, but a blueprint can then be applied to any of the iOS devices you plug in. It’s a great time saver when you know you will be configuring more than one device with the exact same settings.
Creating a blueprint
In this example, I am showing you how to create a blueprint for a rather basic configuration that includes:
- MDM registration
- How much to ask the end-user during the setup wizard
With the Apple Configurator 2 application open on a macOS computer:
Click on Blueprints > Edit Blueprints
Figure 2 shows that you can have multiple blueprints. In my case, I have one blueprint for each of the MDMs that I test with. Most of the companies that I work with will typically only have one blueprint that corresponds to the one MDM they use.

To configure a device or a blueprint, the steps are the same. You use the prepare function, either way.
With the newly created blueprint highlighted, click on Prepare
The Prepare Devices drop-down screen appears, as seen in Figure 3. The choices are for automated enrollment (DEP) or manual configuration. Select Manual Configuration
You have an option to add the endpoints to the Device Enrollment Program as they are prepared, assuming your organization is already setup with DEP. If so, select the “Add to Device Enrollment Program” checkbox. Else, leave that checkbox disabled.
Enable the Supervise devices checkbox. This is after-all why we are using this tool in the first place.
Click Next
Figure 3 shows the Prepare Devices drop-down screen.

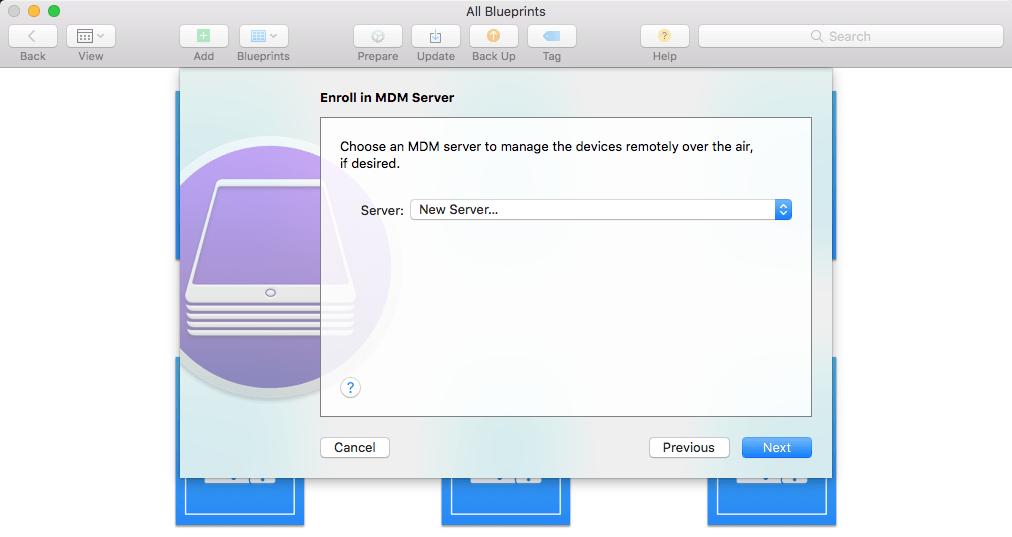
The screen to enroll devices into an MDM server will appear next. If you have defined MDMs in Apple Configurator 2 already, they will be in this list. Otherwise, you will need to add a new server here, as seen in Figure 4.
Select New Server
Click Next
Every MDM that I’ve worked with has a slightly different enrollment process. However, most MDMs should have an option to use a URL for Apple Configurator 2, such as the screenshot from Meraki Systems Manager shown in Figure 5.
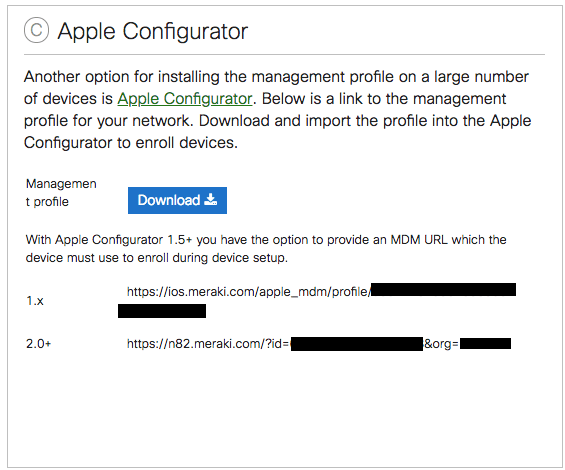
Copy the URL for Apple Configurator 2
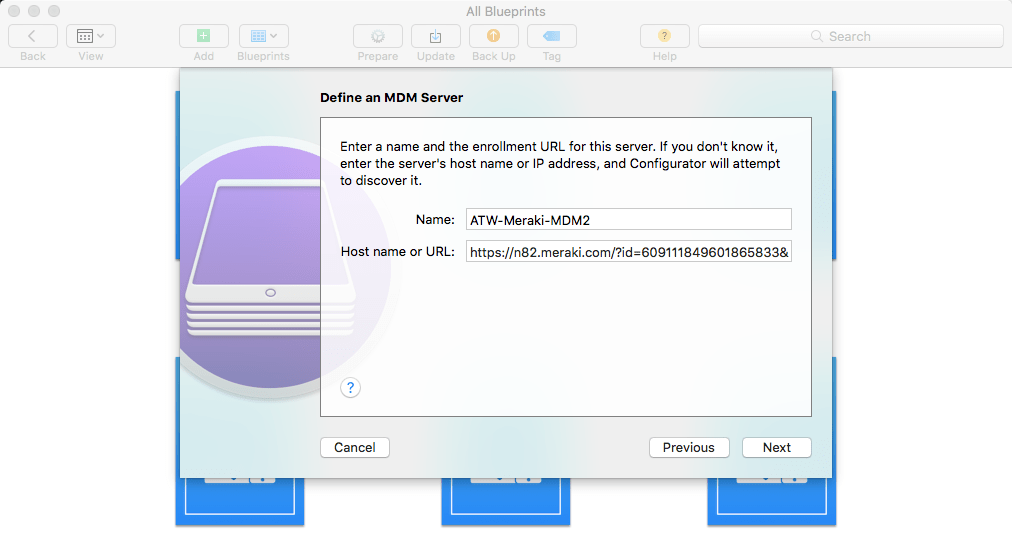
Name the MDM server object
Paste the URL into the Host name or URL field, as shown in Figure 6
Click Next
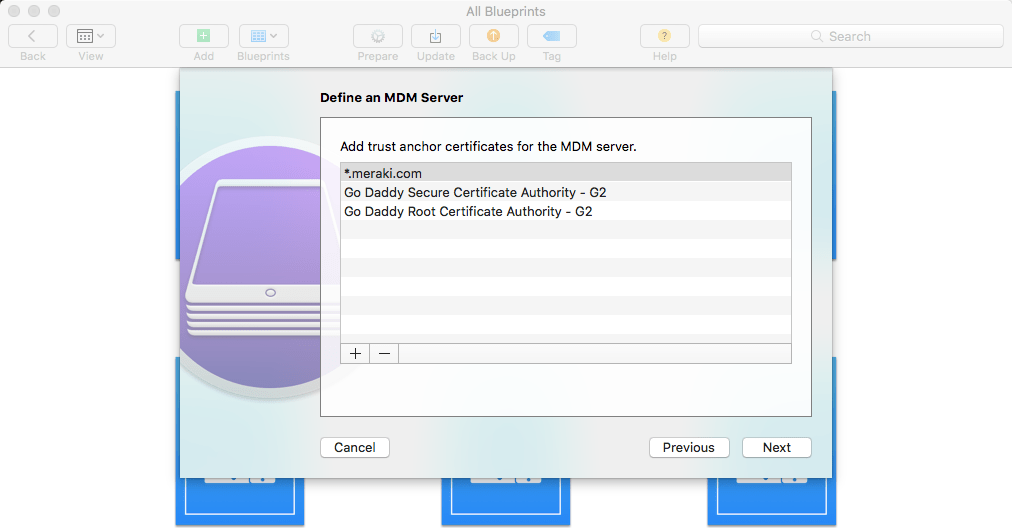
The MDM’s certificate chain will be displayed, as you see in Figure 7. Just click Next to continue.
The Assign to Organization screen is next. If you have an existing organization, it will be in the drop down. Assuming you are setting up a New Organization, click Next.

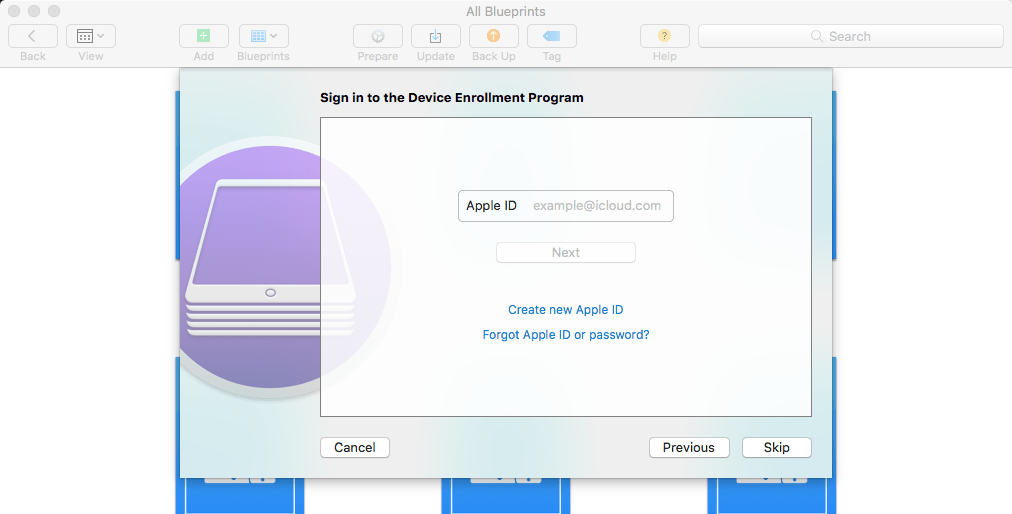
Even though you did not check the box to use the Device Enrollment Program (DEP), the configurator still attempts to get you to login to the DEP program with your Apple ID, as seen in Figure 9. Assuming you do not have DEP already, click Skip.
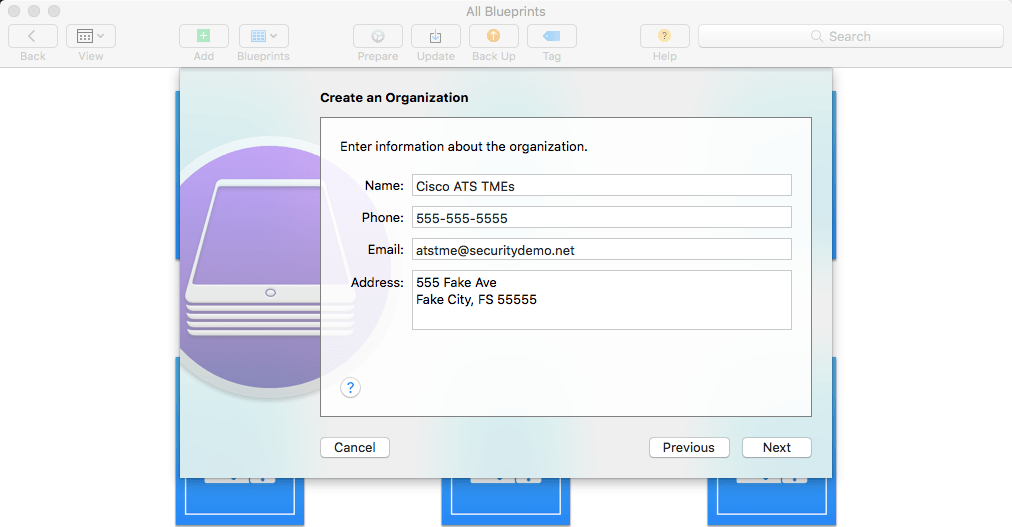
After skipping the DEP login, you will be able to create an Organization object that will be used with device supervision, as seen in Figure 10. Fill out the fields, and click Next. A supervised iOS device may be moved from one MDM to another, as long as the same organization is used.
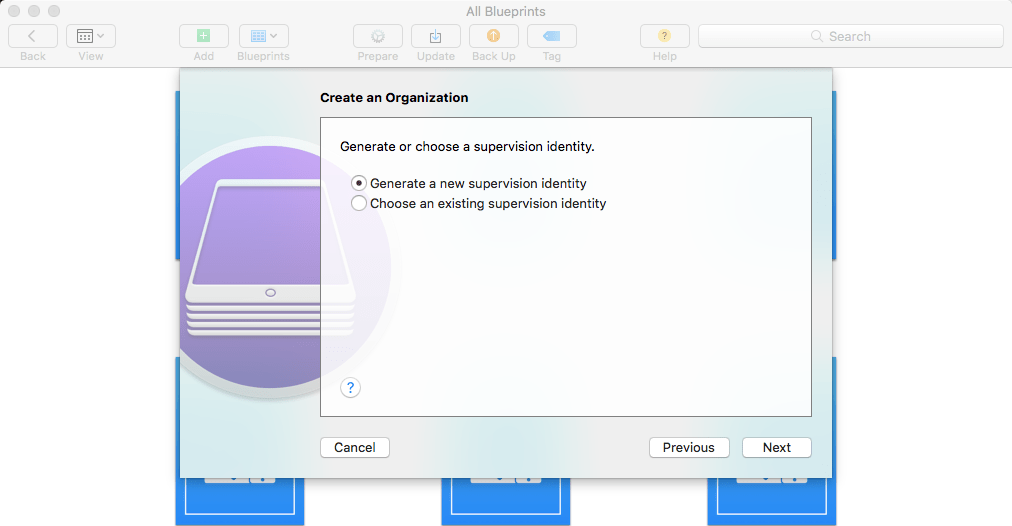
With the organization created, you then setup up a supervision identity, as seen in Figure 11. Select Generate a new supervision identity & click Next.
The last step of the preparation is to select which aspects of the iOS Setup Assistant to display to the end-user when the device is started up for the first time after the blueprint is applied. Figure 12 shows the selection process.

Click Prepare to finish the blueprint.
Click Done to exit the blueprint screen and return to the main Apple Configurator 2 window.
Applying the Blueprint to an iOS endpoint
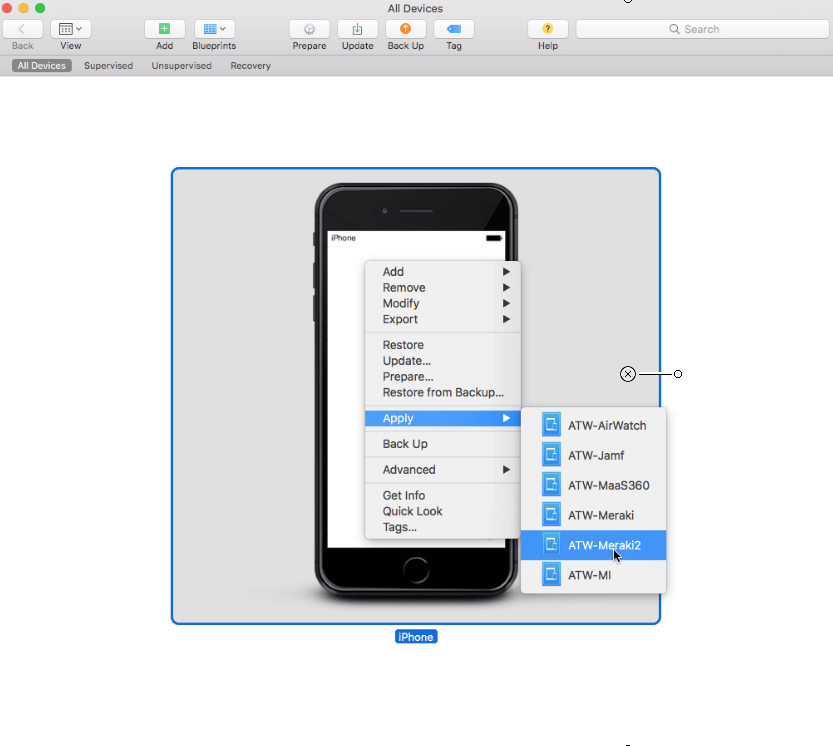
Now that the blueprint is fully prepared, you can apply it to the iOS device. With the iOS endpoint connected to your macOS computer, highlight it in the Apple Configurator 2 app. Note: You can highlight/select multiple devices simultaneously.
Right Click on the device, and select Apply & choose your blueprint.
The configurator 2 app will prompt you again to be sure you wish to apply the configuration. Click Apply.

If your device has a cellular radio in it, the device has to be “activated”. Your cellular provider should not matter (ATT, Verizon, Sprint, T-Mobile or Bob’s Cellular Discount) this step appears to be true for all cellular capable iOS endpoints.
Sometimes the device is activation locked, and needs to be removed from the owners iCloud devices either from the phone or from http://www.icloud.com.
Figure 15 shows the configurator app downloading the activation record.

Figure 16 shows the activation of this iPhone.

At this point, you are finished in the Apple Configurator 2 app. Now you’re ready to interact with the phone itself & go through the setup assistant (or hand it back to the device owner, who will go through the setup assistant). Figure 17 shows the setup assistant step where the remote management (MDM) configuration is applied. This information was passed to the device by the blueprint during the setup stage.
The end user should click on Apply configuration, and then Next, as seen in Figure 17.
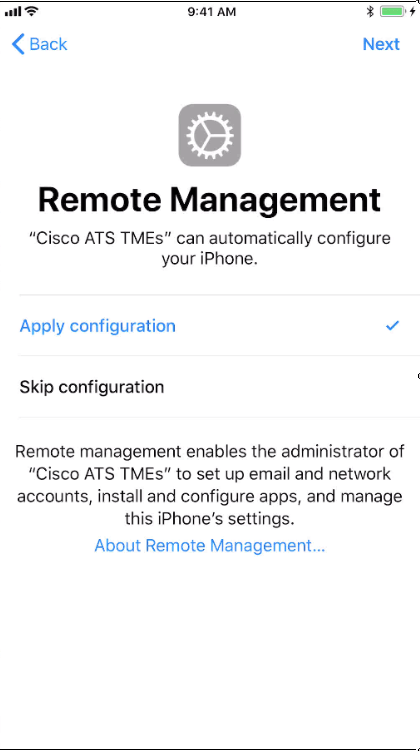
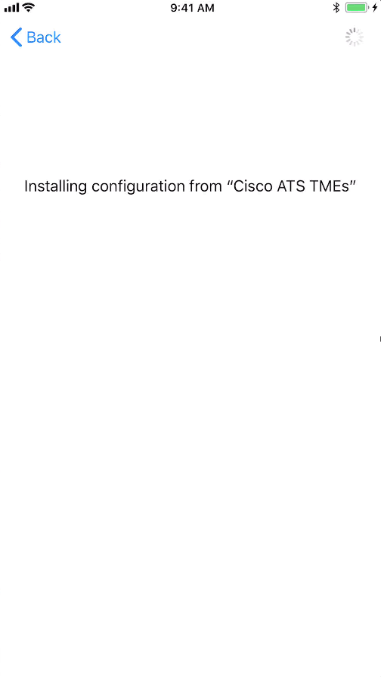
Figure 18 shows the MDM configuration from Meraki Systems Manager (the MDM) being applied to the device.
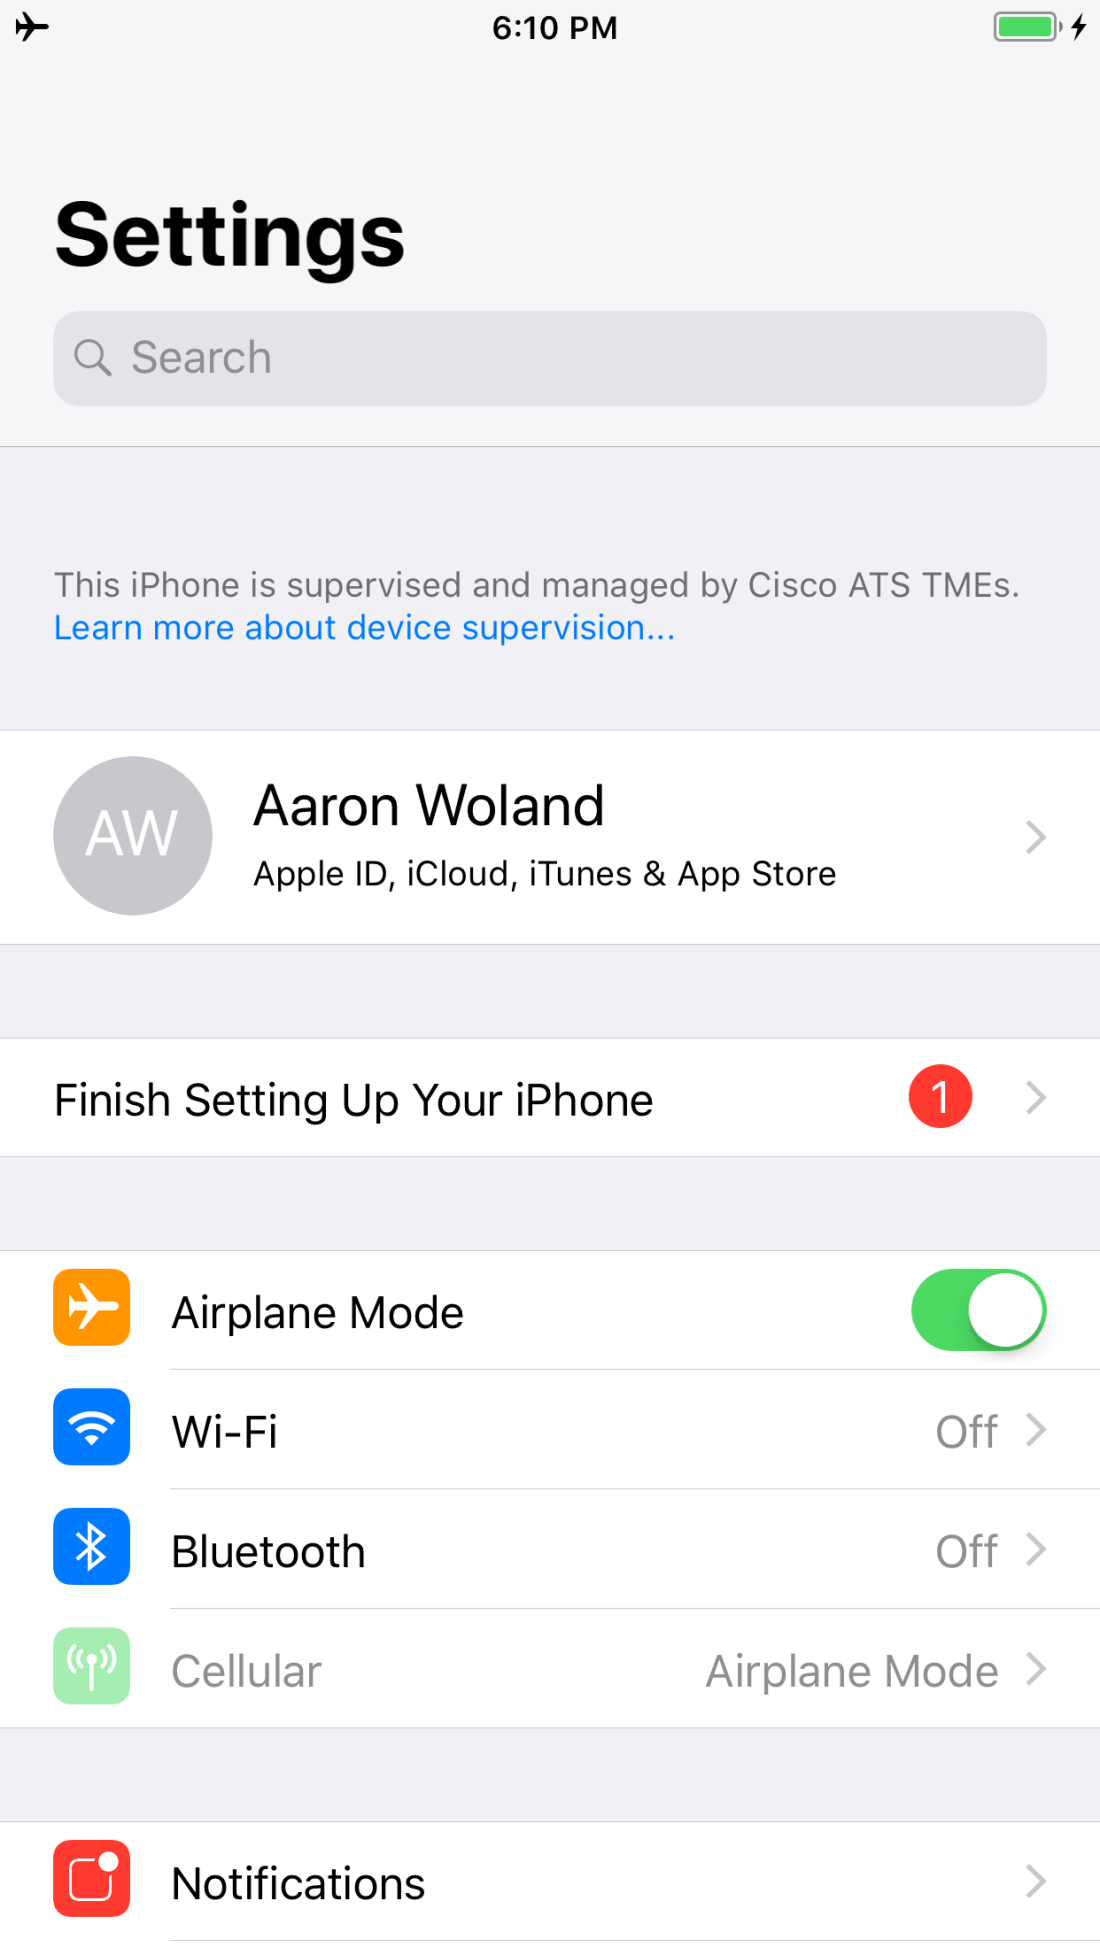
The device is ready! If you navigate to Settings in the iOS device, you will see that the device is supervised and managed by your organization, as shown in Figure 19.
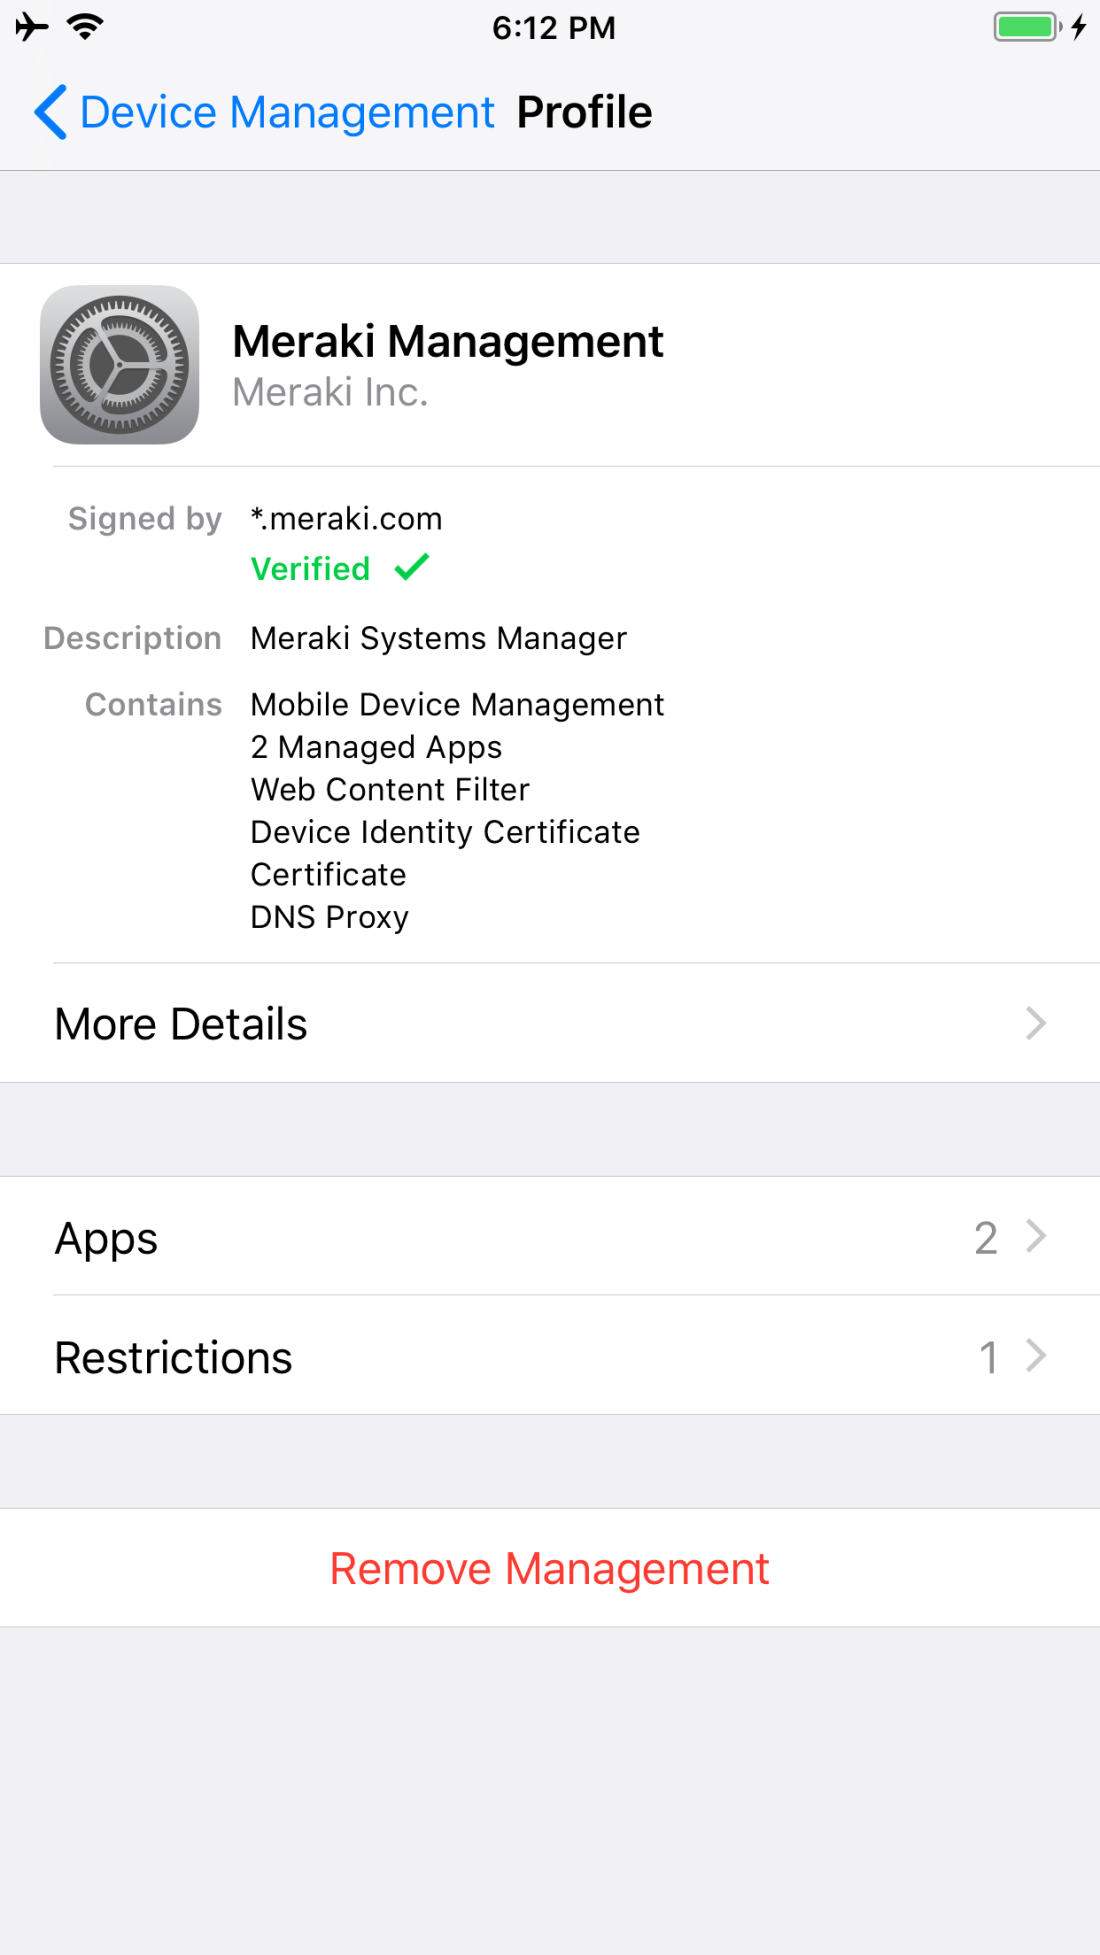
Now, you can go into Settings > General > Device Management, and see the MDM profile that was installed. if your MDM was configured to automatically send down the configuration profile related to the Cisco Security Connector, you will see the Web Content Filter and the DNS Proxy settings are listed, as shown in Figure 20.
If the MDM was configured to automatically provision the Cisco Security Connector APP, then it will appear on the desktop, as shown in Figure 21.
That’s it folks!
I hope you found this helpful. As always, please feel free to leave comments.
-Aaron
