Hopefully, you are fully aware of what Cisco Identity Intelligence is. If not, take a look at this blog post. In short, it’s a fantastic solution for Identity Threat Detection and Response (ITDR).
When a detection fires in Cisco Identity Intelligence (CII); which is to say that a user or login event triggers a failed check (a signature match), it can automatically send a notification to one or more destination. A very popular notification method is a Webhook.
If you want to forgo the education on what Webhooks are and how they work, you can skip ahead.
So what is a Webhook anyways?
When applications need to communicate with one another, they use application programming interfaces (APIs). Humans use a user interface (UI) which can be graphical or through a command line. But applications, also called “programs,” use APIs.
Very commonly, an application will query another application using the API to get data. For example, Cisco XDR may query CII’s API in order to get the list of users and all the properties of those users. That mechanism is referred to as a “pull,” since XDR is then pulling the data from CII. But what if the information needs to be relayed between products/apps in a more timely manner? That sounds more like a “push” method. As in, CII has important information to share and it proactively sends that information to XDR.
That’s where Webhooks come into play. An application that wants to receive push notifications can setup a “listener” and the sending application can be configured to send the notifications to that listener.
For the purposes of this post, CII is the sender, and Cisco XDR is the listener.
How is this listener secured?
Modern webhooks are HTTPS-based and use some form of authentication, whether that’s a certificate, API key, or something else. In the case of Cisco XDR, webhooks have unique URLs with a unique API key in them. This URL is provided to the sender and the combination of the webhook’s unique ID and API key authorizes the request.
Note: anyone with that URL and that API key can send a properly formatted message to the listener, just like anyone with a valid API key can query a RESTful API.
How do webhooks work in Cisco XDR?
Different product that leverage webhooks are likely to have different configuration steps. These differences could be due to user interface design choices or even development/product choices around how the product operates. For this example, we are going to configure Cisco XDR as the listener and Cisco Identity Intelligence as the sender. For your specific receiver/listener, please see that product’s admin guide.
We should always start with the listener first. In XDR, the webhook listener is configured as a “Trigger” in the Automate section of the product. Triggers can be used by XDR automation to run workflows in response to incoming webhooks.
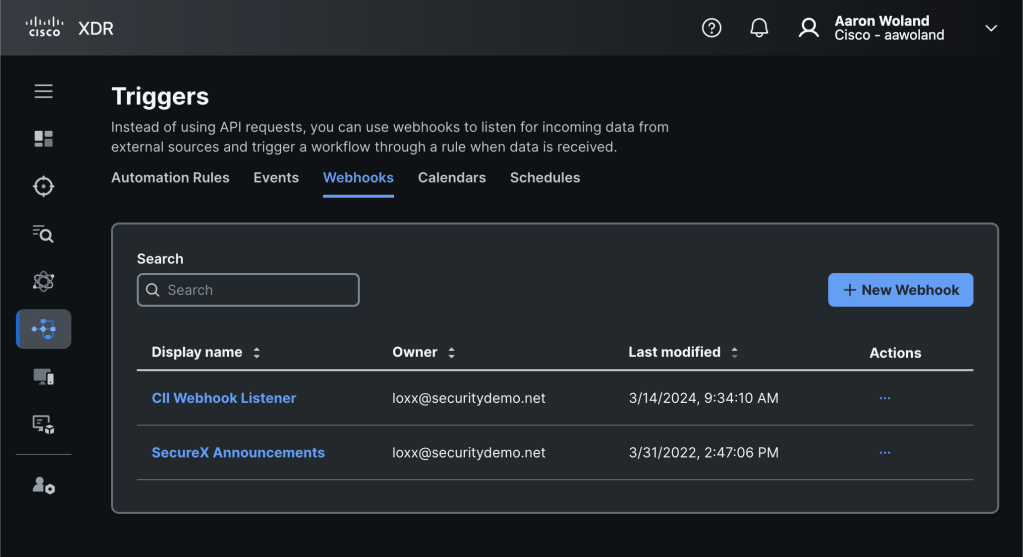
From the XDR UI, navigate to Automate > Triggers. There are numerous triggers in XDR, but you need to click the Webhooks tab and then click New Webhook.
Provide a Display Name for your webhook and an optional Description. The display name needs to be descriptive enough that you will recognize it later and the description should help you remember what the webhook was for when you look at it again in 6 months or a year.
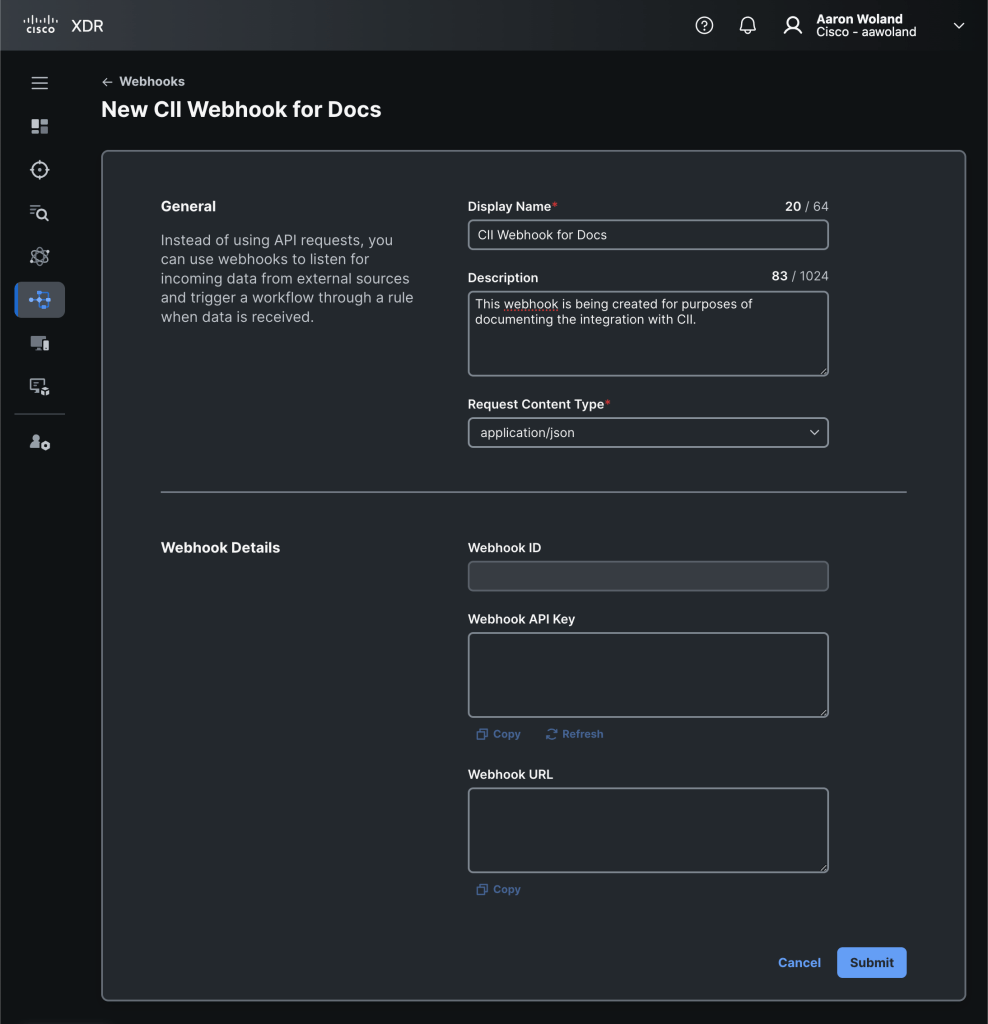
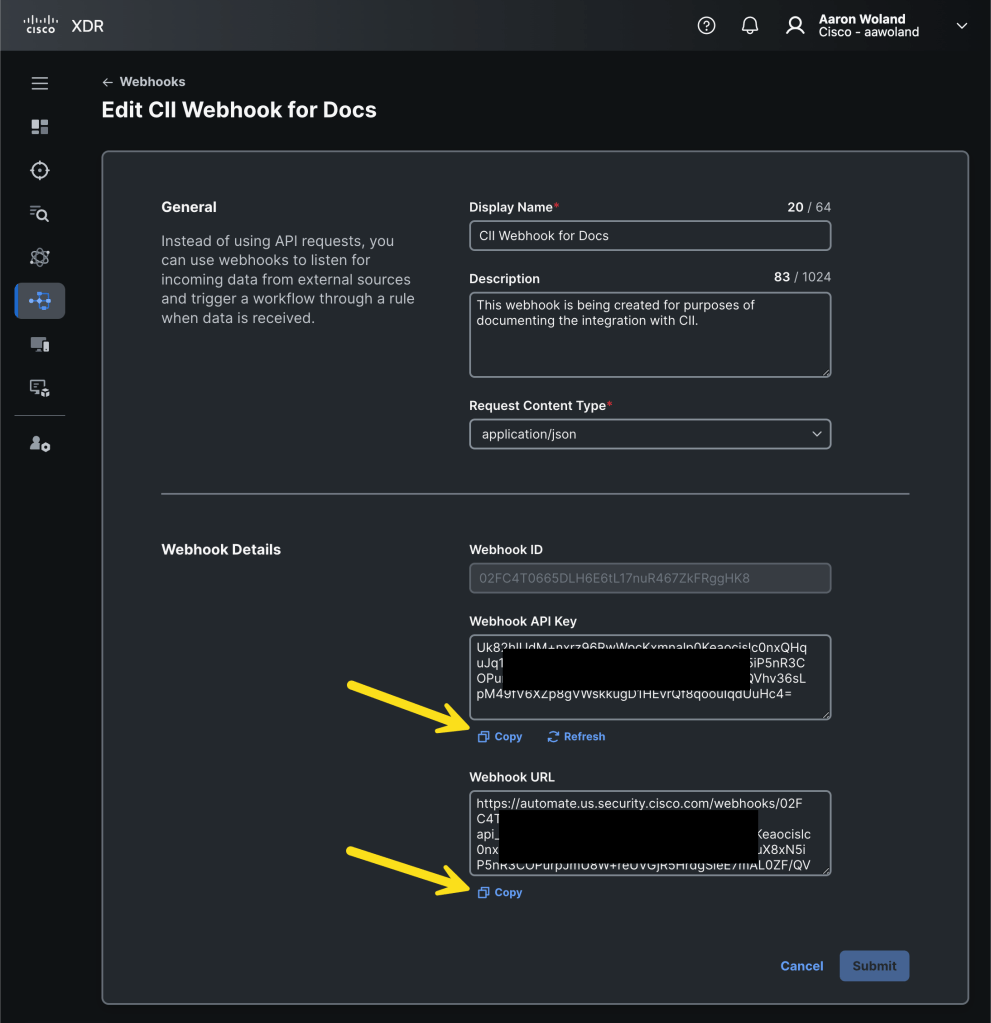
Looking at the screen shot above, the Webhook ID, Webhook API Key, and the Webhook URL will remain blank until after you click Submit. These pieces of information aren’t generated until you save the webhook and it’s created.
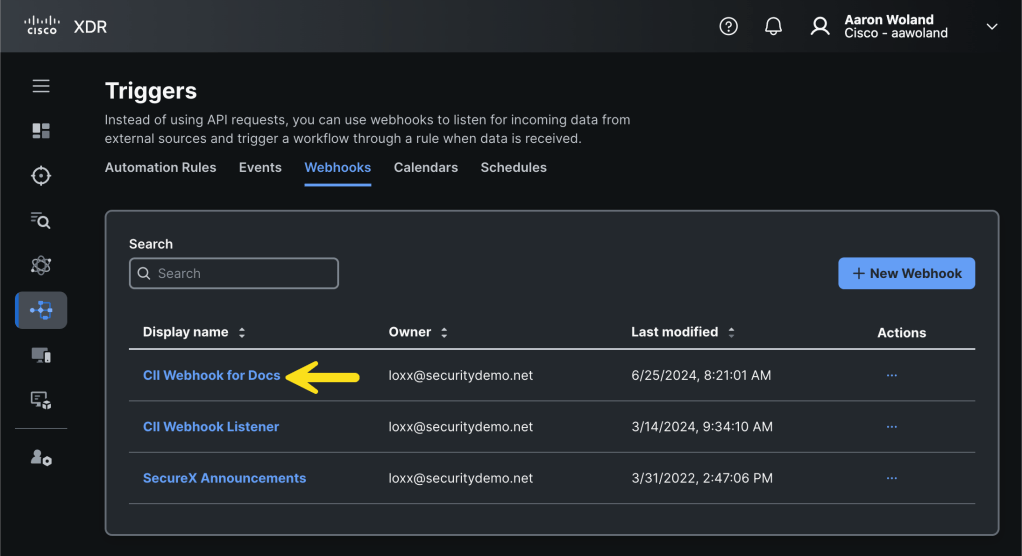
After the webhook has been created, you will be brought back to the Webhooks list. Click on the Display Name of the newly created webhook to view its details.
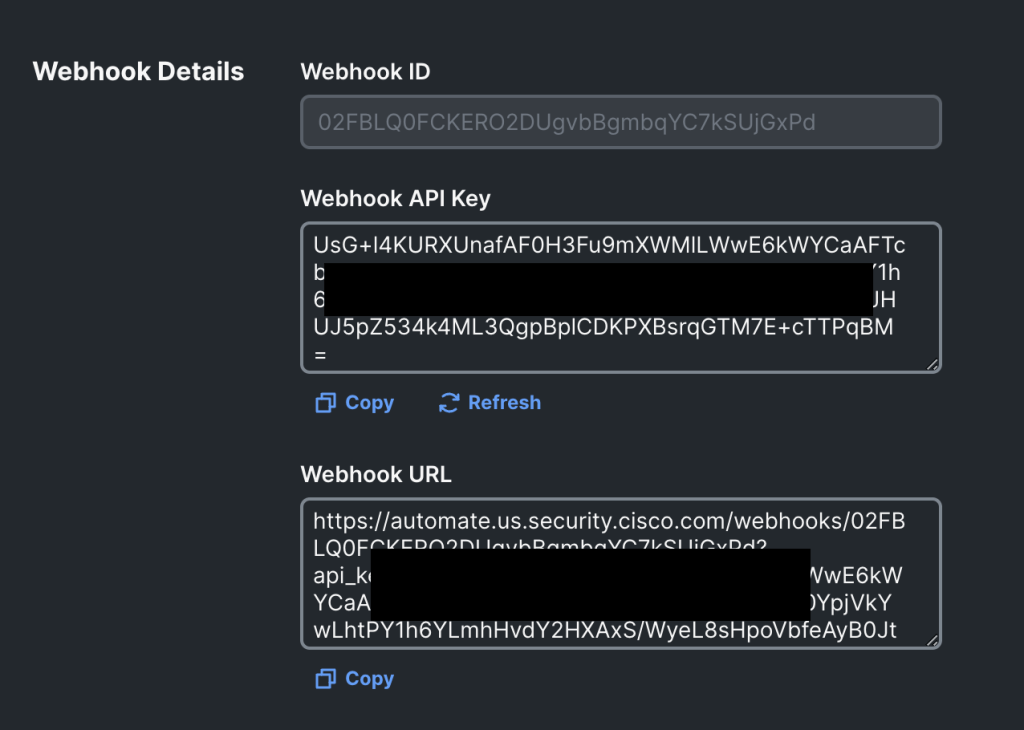
You will now see the details of your new webhook listener. Copy the Webhook API Key and Webhook URL and paste them in a notepad temporarily or a safe place like a password manager.
Configure the webhook to be part of an automation rule
It’s important to note that you’ve created a webhook but it doesn’t do anything. Before continuing, you’ll want to create an identity response workflow in XDR automation and then tie the workflow to your webhook using an automation rule. This is not covered in this blog post but information about automation rules can be found in the XDR documentation.
Create the webhook target in Cisco Identity Intelligence
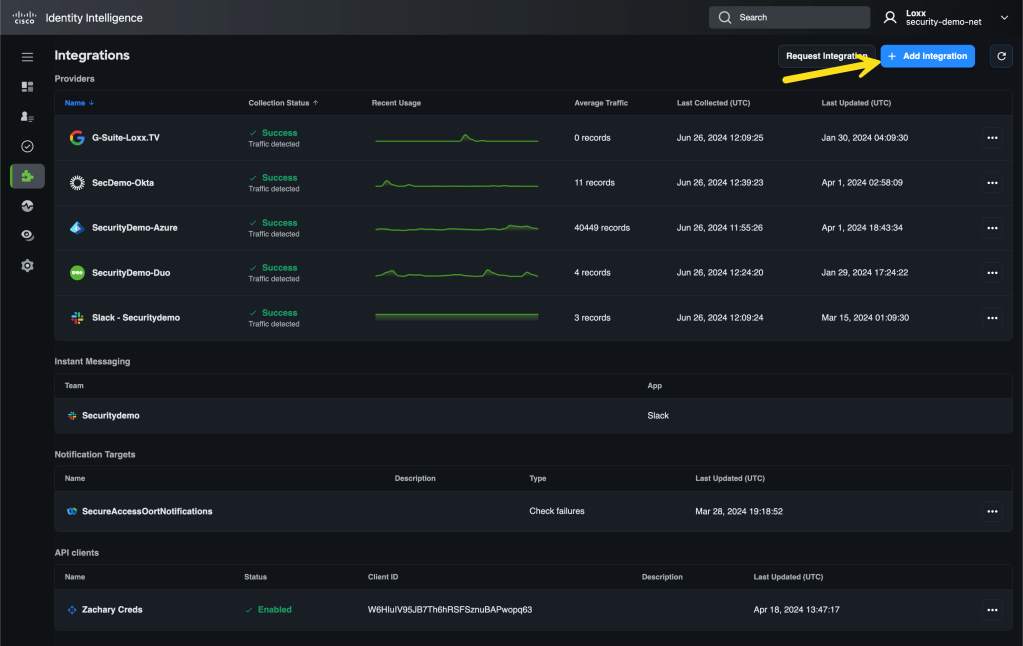
From the CII dashboard, navigate to Integrations and click Add Integration.
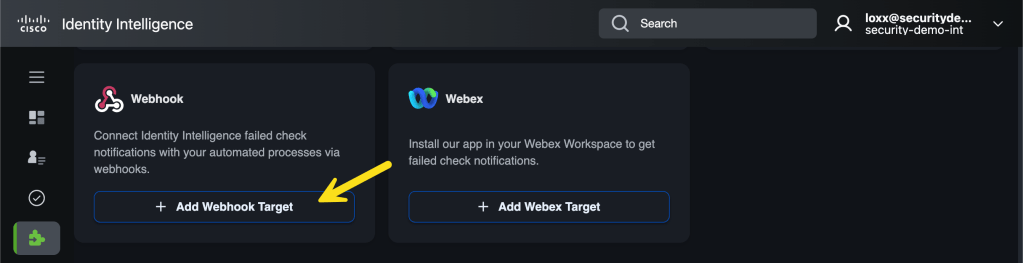
Scroll down to Webhook and select Add Webhook Target.
Here is where things get a little odd. Cisco XDR includes the API key in the webhook’s URL and it expects it to be there. It does not accept the API key information if it is sent in other fields or headers. (I know, right?). XDR also requires two fields be added to the request headers as shown below.
Fill in a descriptive Name for the new webhook target and then paste the webhook URL from Cisco XDR into the Webhook URL.
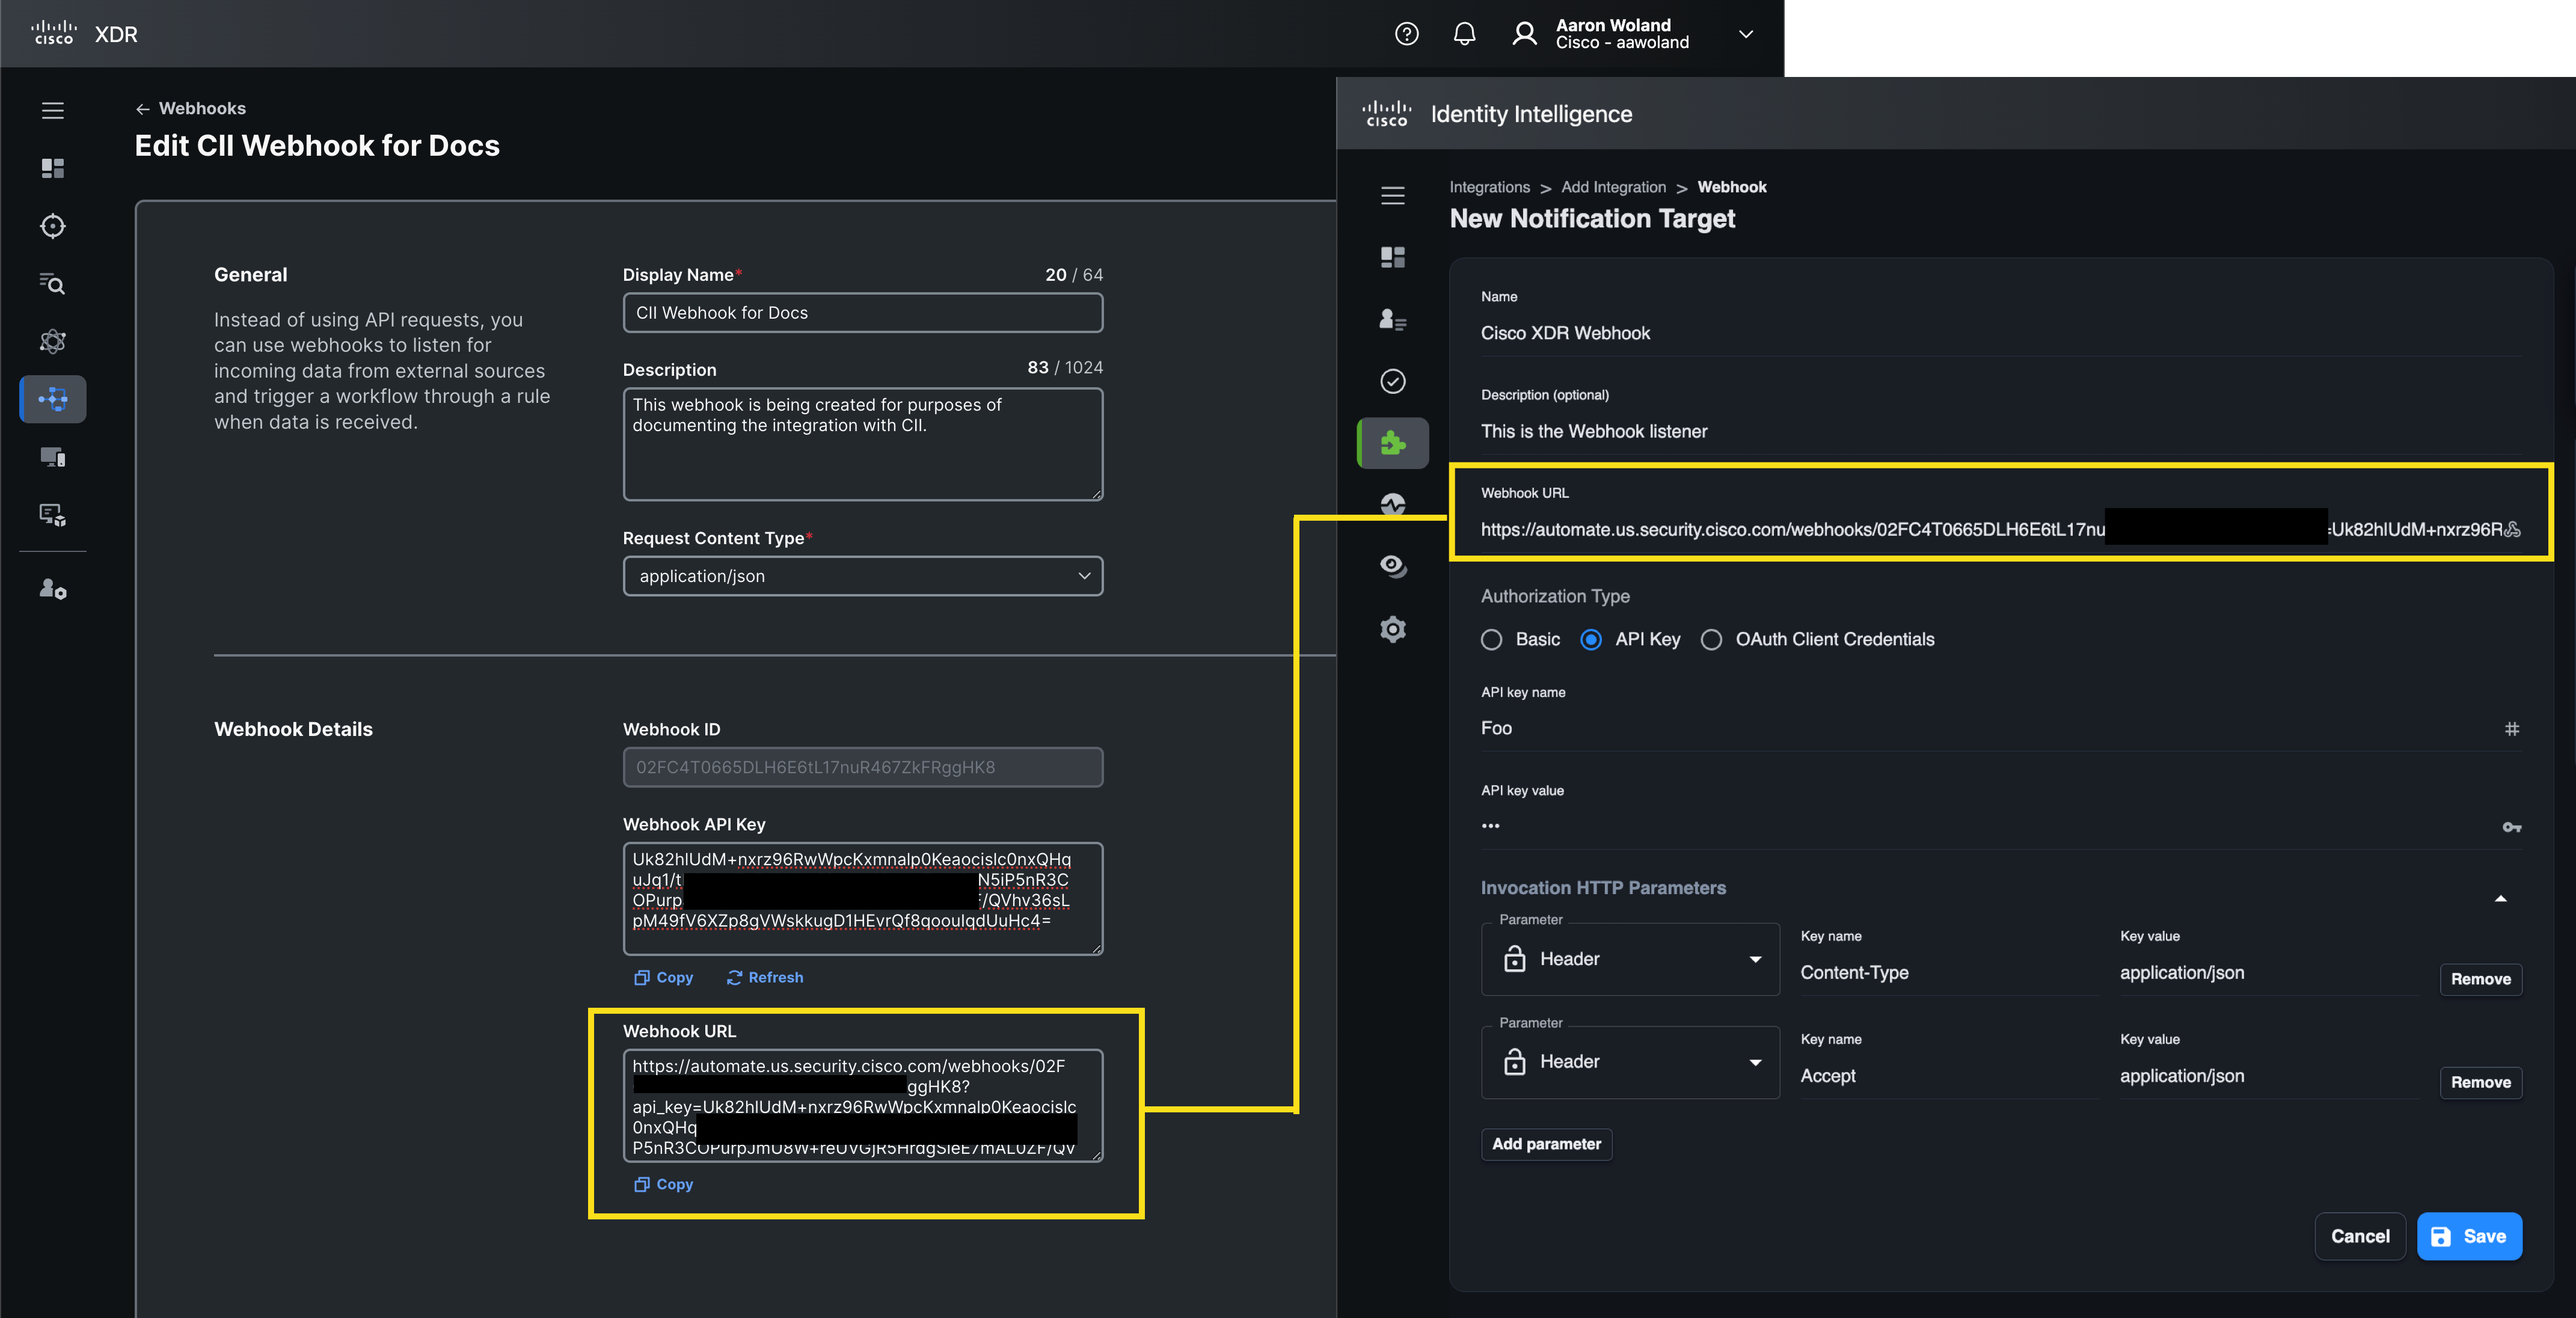
Select API Key for Authorization Type. XDR is not using these credentials, but they are required in the CII form. XDR is getting the API key directly from the URL itself. You can type anything you want as the API key name and API key value.
Expand the Invocation HTTP Parameters section. Add two new parameters both with the type Header. For the first one, type Content-Type as the Key name and type application/json as the Key value. For the second, type Accept as the Key name and type application/json as the Key value. Finally, click Save.
You are now returned to the integrations page in CII. You will see that your new notification target is marked with an amber alert symbol. In the image below, marked with the yellow number 1. This symbol is showing that there are no checks configured to use this notification target.
Click the 3 dots […] to the right of the new webhook notification target, marked with the yellow number 2 in the image below, and select Test Connectivity.
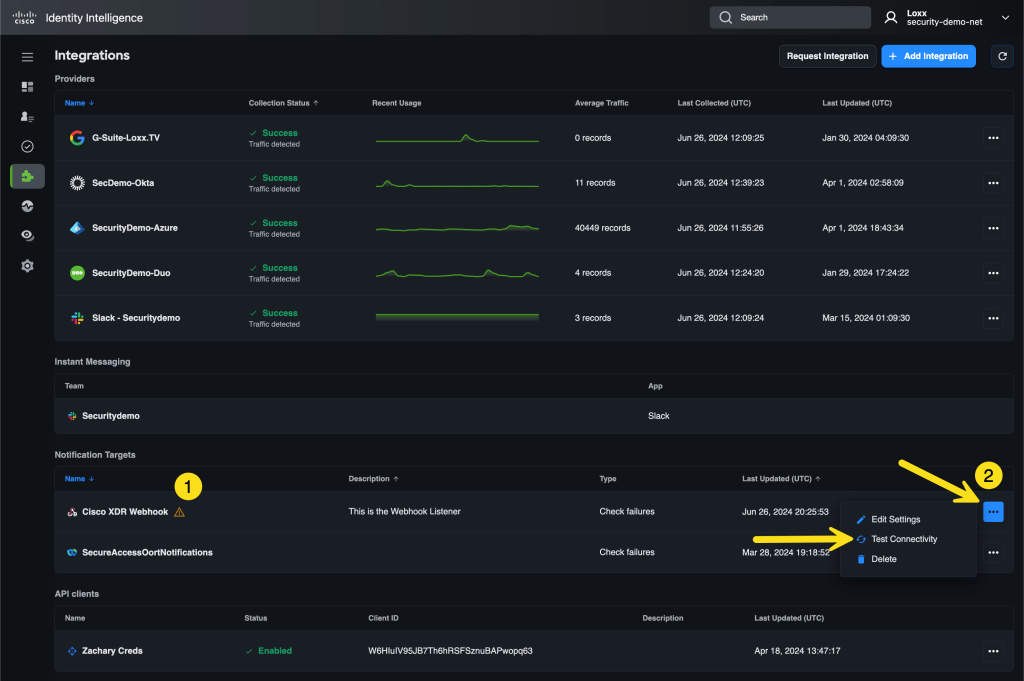
You should see a success message!
You now need to build out your workflows to do _something_ with the data sent by the Webhooks, but that could be a full published book, not just a section of blog post 🙂
